Tag Archives: Candy

The Five Ways to Get The Best Out of Ginger

After posting, “Secrets of Ginger.” I wanted to also provide you with some of the things I do with ginger, to get the most out of it. Ginger is loaded with flavor and a super food. For those who follow the PointsPlus program. Using Splenda and/or Truvia instead of sugar guarantees you no points.

No. 1 Raw Ginger:

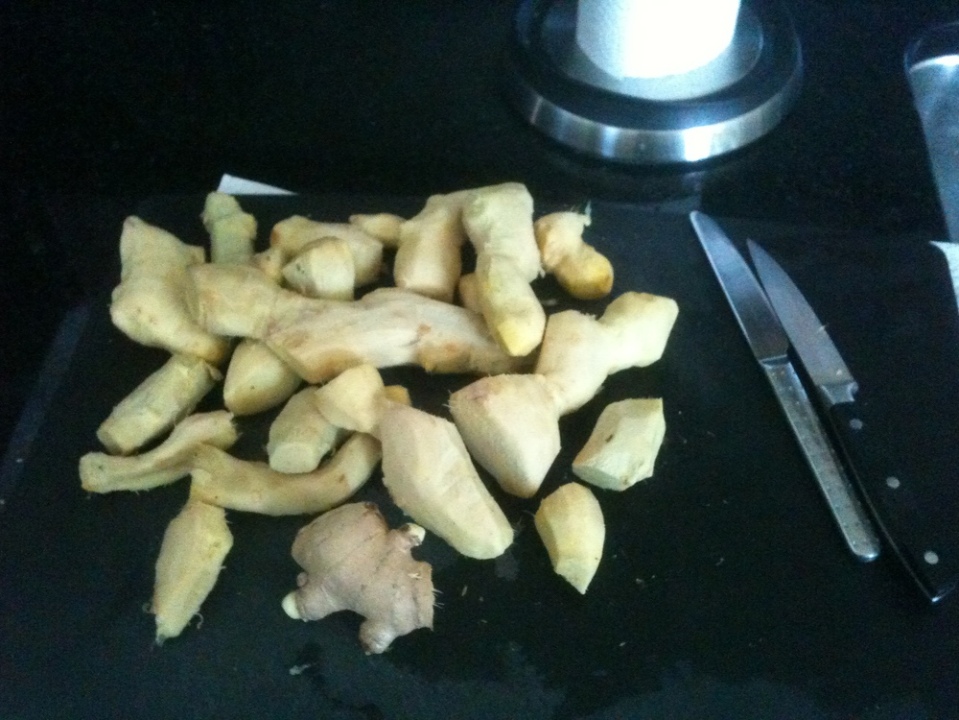
The first way to enjoy ginger is to use it raw.  I buy about 4 lbs of Ginger on average every month, plus or minus a week. One pound of that I keep as fresh ginger. The other three or so pounds I process and make turn it into 4 other types of ginger.

Keep the ginger in the fridge until ready to use. Freeze the ginger if you’ve had for more than 3 weeks. But first, process it by snapping off pieces and removing the skin with a butter knife or spoon. Cut off any over dried knuckles and blemishes. I like to use raw ginger in Miso salad dressing, soups, noodle dishes, stir fries and marinades. Frozen ginger grates easily with a micro-planer.

The second way of using the ginger is the first step to the next 4 uses for ginger.  Pickled ginger also known as Gari, primarily eaten with Sushi.  However, you can also add this to salads and sandwiches to add a fresh taste.

No. 2 Pickled Ginger:

Ingredients:

  • 2 lb fresh young ginger
  • 3 cups rice vinegar
  • 2 cups sugar/Truvia or 48 packets of Splenda
  • 2 tsp salt

Preparation:

Wash the ginger root and rub off skin with a spoon or butter knife. Slice the ginger thinly (use a mandolin slicer if you can’t slice thinly) and salt them. Leave salted ginger slices in a bowl for about an hour.

Dry the ginger slices with paper towels and put them in a glass or non reactive container

In a pot, over medium high heat dissolve the sugar into the rice vinegar and bring to a boil. Pour the hot mixture of vinegar and sugar over the ginger slices.

Let the ginger and pickling juices cool down before refrigerating. Cover and keep 3-4 days before using, it will keep refrigerated for up to one month.

While you are slicing, you will have pieces left over that are either too thick or irregularly shaped.  Collect all of that, plus slice more about 1/8 of an inch thick to combine and equal 2 cups worth.  We are going to use those to make ginger the third and fourth way to use Ginger.

No. 3 Ginger Syrup:

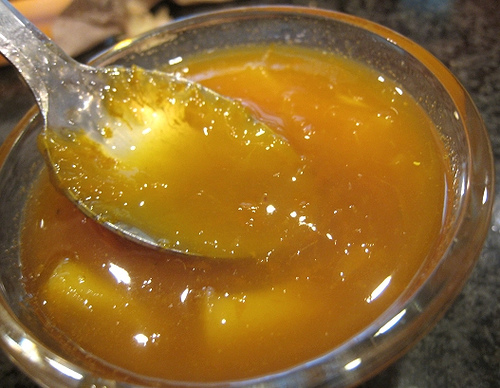
This stuff is great for adding to teas and hot cereals and grains like Oatmeal and Quinoa.  The syrup is especially good, if you are into making homemade ginger ales and cocktails.

Ingredients:

  • 2 cups sugar/Truvia (or 48 packets of Splenda)
  • 2 cups fresh ginger, cut into 1/8-inch slices (about 2 large hands)
  • 2 cups water

Preparation:

Basically, to start we are going make simple syrup.  In a medium saucepan over high heat, combine sugar, ginger and water and bring to a boil.  Reduce heat and simmer until syrupy and reduced by half. That shouldn’t take more than an hour.  Strain ginger pieces out and reserve syrup. Don’t worry if it looks thin, the syrup will thicken as it cools.

The byproduct of making Ginger Syrup is what we are going to make next.

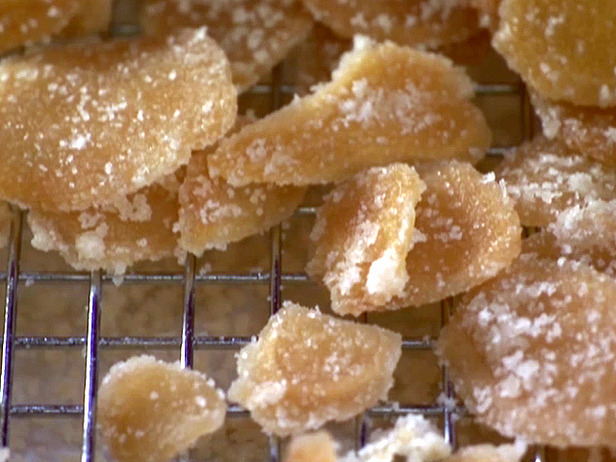
No. 4 Candied Ginger:

Ingredients:

  • Strained and reserved ginger slices
  • 1 sup sugar/Truvia or 24 packets of Splenda

Preparation:

Take your remaining ginger that you strained from the Ginger Syrup and place it on a shallow plate filled with about 1 cup of granulated sugar.  Mix the ginger in the sugar to coat completely. Then move the sugar coated ginger to a sheet pan lined with parchment paper.  Bake the sugar coated ginger for about 4 hours at 200 degrees to turn it into candied ginger.

Finally we take the ginger syrup and candied ginger to make the final recipe of the Five

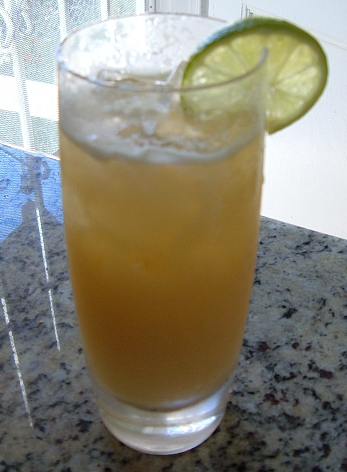
No. 5 Homemade Ginger Ale:

Ingredients:

  • Ginger syrup
  • 1 piece candied ginger
  • Ice cold club soda or seltzer water
  • squirt of fresh lime slice

Preparation:

For each 16-ounce serving, mix 1/4 cup ginger syrup with 1 cup cold club soda and pour over ice. Additional ginger syrup and/or sugar may be added to taste. Garnish with a piece of candied ginger and a lime slice.

Bacon and Cashew Caramel Corn

Ingredients:

  • 1/2 cup popcorn kernels
  • 2 tablespoons vegetable oil
  • 6 ounces bacon, chopped
  • 1/2 cup unsalted raw cashews (one 2.5-ounce package)
  • 1 teaspoon coarse kosher salt or coarse sea salt
  • 1/4 teaspoon cayenne pepper
  • 1/4 cup heavy whipping cream
  • 1 tea bag
  • Nonstick vegetable oil spray
  • 1 1/2 cups sugar
  • 1/4 cup water
  • 2 tablespoons light corn syrup

Preparation:

Preheat oven to 300°F. Heat popcorn and oil in covered heavy large pot over medium-high heat until kernels begin to pop. Using oven mitts, hold lid on pot and shake pot until popping stops. Pour popcorn into very large bowl. Cook bacon in heavy large skillet over medium heat until almost crisp. Using slotted spoon, transfer to paper towels to drain; cool. Add bacon and cashews to bowl with popcorn. Sprinkle with coarse salt and cayenne; toss to coat.

Bring cream and tea bag just to boil over medium heat. Remove from heat; let steep 15 minutes, occasionally pressing on tea bag with back of spoon to release flavor. Discard tea bag.

Line rimmed baking sheet with foil; coat with nonstick spray. Coat 2 wooden spoons or heat-resistant spatulas with nonstick spray; set aside. Stir sugar, 1/4 cup water, and corn syrup in large saucepan over medium-low heat until sugar dissolves. Increase heat to high; boil without stirring until syrup turns deep amber, occasionally swirling pan and brushing down sides with wet pastry brush, about 13 minutes. Remove from heat and immediately add cream (mixture will bubble up). Stir until blended. Immediately drizzle caramel over popcorn mixture; toss with sprayed spoons until evenly coated. Transfer to sheet.

Place caramel corn in oven and bake until caramel is shiny and coats popcorn, tossing mixture occasionally, about 20 minutes. Cool completely on sheet on rack, tossing occasionally to break up large clumps. DO AHEAD Can be made 2 days ahead. Store in airtight container in the refrigerator.

Candied Bacon With A Kick

 I tried this recipe the other morning.  Who doesn’t love bacon?

Ingredients:

  • 1/2 cup firmly-packed brown sugar
  • 2 tablespoons prepared mustard
  • 1 tablespoon Cayenne Pepper
  • 1 tablespoon Black Pepper
  • 1 pound thick-cut pork bacon

Preparation:

In a large frying pan over medium-high heat, slowly cook bacon until bacon is lightly browned on edges but still flexible, turning over once, approximately 5 minutes total per batch. Drain the fat each time. (Remember bacon crisps as it cools, so do not over cook.) Remove cooked bacon from the frying pan and place onto paper towels to soak up excess fat.

After draining fat from the frying pan, reduce heat to low.  Grab a bowl and add all the cooked bacon with the brown sugar, pepper and mustard mixture, tossing with a fork to coat the pieces evenly.  Return the bacon to the frying pan. (NOTE: Sugar melts very slowly and burns easily; reduce heat further if necessary, after the sugar begins to caramelize.) 

Remove from heat and transfer onto a wire rack to cool. Keep the pieces separate or they will stick together.

Gastronomic Adventure for the Sweet-toothed Pork Aficionado

Caffeinated Maple-Bacon Lollipops!

Who doesn’t love bacon?

Lollyphile, a San Fransico based confectioner of uniquely blended balls of hardened molten sugar. They are the orignianl creators of the Maple Bacon Lollipop.

Now, these gastronomic explorers,  have taken it to the next level; and made it the bacon-y equivalent of an energy drink, by adding two cups worth of caffeine to the already time-tested wonder of organic, sustainably farmed bacon and delicious Vermont maple syrup.

I am happy to present the “Caffinated Maple-Bacon Lollipop!”

A direct quote from their website:

“We stand in awe, heady with the thrill of maple bacon discovery, and cold munchin’ on a lollipop.”

Check out their unique blend of flavored lollipops and lollli-pop-art.

http://www.lollyphile.com/