Tag Archives: Bacon

Chicken Fried Steak Sliders with Country Bacon Gravy

This recipe works great with chopped steak, beef or pork tenderloins and chicken or turkey

Ingredients:

For the Chicken Fried Steak:

  • 2 – four oz pieces of chopped steak or pounded out filet tenderloin pieces
  • 2 teaspoon Ground Black Pepper
  • 2 cups of buttermilk
  • 1 teaspoon Salt
  • 2 cups Flour
  • ¼ cups of a neutral oil, like peanut, canola or grape seed.
  • 1 tablespoon of rendered bacon fat
  • 4 slices of chopped crispy thick sliced bacon

For the Bacon Gravy:

  • Drippings from the Chicken Fried Steak skillet
  • 3 tablespoons Flour
  • 1 tablespoons Butter
  • 2 tablespoon rendered bacon fat
  • 2 cups Milk
  • 1 cup chicken stock
  • 2 teaspoons Ground Black Pepper
  • 1 teaspoon Salt (if necessary)

For the Sliders:

  • 8 pieces of Chicken Fried Steak (optional Chicken/Turkey or Pork tenderloin)
  • Bacon Gravy
  • 8 Potato Rolls (or dinner rolls of your choice)

Preperation:

For the Chicken Fried Steak: Cut the chopped steaks or tendeloin pieces in half. Pound them out to make them thinner (about 1/4 inch thick). Next soak them in buttermilk while you fry the bacon (slow and low) and collect the rendered bacon fat (about 2-3 tablespoons) and allow the bacon to crisp.

For Chicken or turkey breasts: For the Fried Chicken/Turkey: Cut the chicken breasts in half widthwise. Pound them out to thin (about 1/4 inch thick) and cut in half again.

After you are done with the bacon, add the salt and pepper to the flour in a shallow bowl or large plate. Remove the steak (chicken, turkey or pork) from the buttermilk and dredge each piece in the flour, generously coating all sides, pressing the steak into the flour. Repeat with the rest of the pieces. Set the pieces of chicken fried steak on a rack to air dry.

Heat a heavy bottomed skillet over medium heat. Add the oil and bacon fat. Once up to temp add the chicken fried steak pieces to the skillet, taking care not to crowd. Keep an eye on the side of the chicken fried steak that’s facing down and when it turns a light golden color, turn the pieces over. Then after the other side turns a light golden color, turn them to the other side.

After that side turns a little bit darker, turn the chicken fried steak again. The idea is to not let it cook or brown too fast. If you notice that the drippings in the pan are turning a darker brown color, turn the heat down just a bit. When all sides of the chicken fried steak are a light golden brown (about 7 minutes) turn off the heat, remove them rom the pan, set each piece on a rack or plate, and set aside.

For the Bacon Gravy: Pour out the oil so that just the yummy crunchies are left in the pan. Heat the skillet with the drippings and one tablespoon of rendered bacon fat. Add the butter and let it melt before adding the flour, then stir until the mixture thickens up (about 2 minutes). Next, while stiriing, add the milk, chicken stock and pepper. Continue stirring until the gravy is at the desired consistency (about 5 minutes). Add a few tablespoons of water if you need to thin it out. Season with the salt if necessary.

For the Sliders: Lay the bottom side of each slider roll on the serving plates with the inside of the roll facing up. Ladle some gravy over the roll. Then add a piece of the chicken fried steak, and ladle more gravy over the piece of chicken fried steak. Add the top piece of the slider roll. Serve while warm.

Follow Me on Pinterest

Why I Follow #Baconbarter and Thank Oscar Mayer

For those who don’t know, there is free Oscar Mayer butcher thick cut applewoood smoked bacon for barter. As seen on ABC’s Good Morning America, Oscar Mayer is sponsoring the cross-country trip of comedian and actor Josh Sankey…using only bacon as currency, to barter his way across the country. Josh Sankey (AKA @baconbarter on twitter) is traveling from east to west coast in a trailer along with 3,000 pounds of Oscar Mayer’s NEW Butcher Thick Cut Applewood Smoked Bacon. Josh is using this highly prized commodity as currency to trade for lodging, tickets to events, meals, etc.

You can follow him on his website http://www.baconbarter.com/ where they show online followers making him offers, based on his immediate needs.

How did I get so lucky? Let’s just call it, “the right tweet at the right time.

Here’s how it went down, for the most part. Last Monday, on Twitter, I tweeted about a bacon doughnuts, Josh saw the tweet and replied…

Reply 10 SepJosh Sankey @baconbarter

@javilabbe, I can’t get you a bacon doughnut, but I do have 3000 bricks of bacon to trade—follow me to see why! #BaconBarter

That sounded good to me, so I followed @baconbarter; and he replied with…


From baconbarter to me: Sep 11, 12:40pm

Hi, thanks for the follow! I’d like to send you some Butcher Thick Cut Bacon. Can you just DM me your mailing address? 

I didn’t think much about it, so I went head and DM’d @baconbarter my address as requested.

Josh replied with:

From baconbarter to me: Sep 11, 12:40pm

All I ask for in return is a tweet about @baconbarter. I’m traveling the country w/ just a trailer of bacon to barter with! Wish me luck! 

From me to baconbarter: Sep 11, 1:08pm 

Sure! I typed back, “Good luck. Keep us in the loop”

From baconbarter to me: Sep 11, 2:39pm

Will do, Javier! Nice bartering with you. Enjoy the bacon!

Retweet javilabbeSep 11, 8:45pm via HootSuite

@baconbarter is out n’about RT @HealthyKidsGrow: @baconbarter in addition to the couch, I can provide a home cooked meal too.

Guess what arrived at my front door yesterday?  #BACON

Now, I’m on the lookout for tweets, to RT and share the excitement for @oscarmayer and @baconbarter search for #baconbarter on twitter or look for them on Facebook.

Chocolate Coated Candied Spicy Bacon

Ingredients:

  • 1/2 cup firmly-packed brown sugar
  • 2 tablespoons prepared mustard
  • 1 tablespoon Cayenne Pepper
  • 1 tablespoon Black Pepper
  • 1 pound apple smoked pork bacon
  • 1 lb chocolate or chocolate candy coating
  • Flaked sea salt, chopped nuts, or other toppings of your choice

Preparation:

In a large frying pan over medium-high heat, slowly cook bacon until bacon is lightly browned on edges but still flexible, turning over once, approximately 5 minutes total per batch. Drain the fat each time. (Remember bacon crisps as it cools, so do not overcook.) Remove cooked bacon from the frying pan and place onto paper towels to soak up excess fat.

After draining fat from the frying pan, reduce heat to low.  Grab a bowl and add all the cooked bacon with the brown sugar, pepper and mustard mixture, tossing with a fork to coat the pieces evenly.  Return the bacon to the frying pan. (NOTE: Sugar melts very slowly and burns easily; reduce heat further if necessary, after the sugar begins to caramelize.)

Remove from heat and transfer onto a wire rack to cool. Keep the pieces separate or they will stick together.

Melt the chocolate in a double boiler or in the microwave. If you are using chocolate candy coating, simply melting it is fine. If you are using real chocolate, temper the chocolate, so that it remains shiny and hard at room temperature.

Holding a strip of bacon at the top, carefully dip most of it into the melted chocolate. I prefer to keep about an inch of bacon uncovered, so that is easier to eat (and easier for other people to identify what they are eating!) but you can always use a fork to dip the bacon completely in the chocolate if you want it entirely covered up. If you have trouble dipping the bacon; use a spoon to pour the melted chocolate over the bacon until both sides are covered to your liking.

Lay the chocolate-dipped bacon on a tray or plate covered with waxed paper. While the chocolate is still wet, sprinkle the top with flaked sea salt, chopped toasted nuts, or any other toppings you’d like. Repeat until all of the bacon is covered with chocolate.

Refrigerate the tray to set the chocolate, for about 15 minutes. Once set, let the bacon come to room temperature, and it’s ready to eat! Store Candied Spicy Bacon dipped in Chocolate in an airtight container in the refrigerator for up to 3 days.

Ultimate Guacamole Pico de Gallo BLT with a Fried Egg

Ingredients:

  • Bacon
  • Egg
  • Cheese
  • Butter
  • Guacamole
  • Pico de Gallo
  • Lettuce
  • Mayonnaise 

Preparation: 

Cook your bacon. I used 3 slices cut in half. In the meantime toast three pieces of bread lightly. Once the bacon is done, fry an egg in the rendered fat.

Build the sandwich by layering the bottom pieces with pico de gallo. Then take the middle slice and slather guacamole on one side. close that side of the sandwich, whic will be the top.

Now you have a bottom and top to this half of the sandwich. We are going to place this bottom piece on the griddle when making the this BLT. So, with the guacamole side down, spead mayonnaise on the top. lay your bacon over it; and then the cheese.

Now we can build it… Put the fried egg on top of the cheese (t should be hot enough to melt the cheese). Spread some mayo on the underside of the top slice of bread; and add shredded lettuce.

Melt butter on the griddle toast the bread, Close it up and place on the griddle.

Voila… cherry tomato and parsley for garnish

Cast Iron Skillet Bacon Mac and Cheese

Ingredients:

  • 1 pound dry pasta (recommended: elbow macaroni, shells, penne, etc.)
  • 1 teaspoon dry mustard, or to taste
  • ¼ teaspoon ground cayenne pepper
  • 2 cups grated sharp Cheddar cheese
  • 1 cup grated Gruyere cheese
  • 1 cup, plus ½ cup grated Parmesan cheese
  • 1 cup milk
  • ¼ cup heavy cream
  • 1 ½ cups Panko (Japanese) bread crumbs
  • 2 tablespoons chopped fresh flat-leaf parsley
  • 6 slices bacon, cooked, reserve ¼ cup rendered bacon fat

  Béchamel Sauce:

  • ¼ cup unsalted butter
  • ¼ cup flour
  • 3 cups hot whole milk
  • ¼ teaspoon nutmeg
  • Salt, to taste.
  •  Pepper, freshly ground

Preparation:

Bring a pot of salted water to a boil and cook the pasta until nearing al dente, but not fully cooked (2 minutes short); drain. Preheat the oven to 400° F. 

In the meantime start with the Béchamel Sauce Melt the butter in a 12 inch heavy-bottomed saucepan or oven safe skillet (like cast iron). Whisk in the flour and cook, stirring constantly, until the paste cooks and bubbles a bit, avoid browning, about 2 minutes. Add the hot milk, continuing to stir as the sauce thickens. Bring the sauce to a boil. Add the nutmeg, salt, and pepper, to taste. Reduce the heat, and cook, stirring for 2 to 3 minutes more. Remove from the heat.

Finish Building:

Over low heat, stir the dry mustard and cayenne pepper into the béchamel sauce. Gradually add the Cheddar, Gruyere, and 1 cup Parmesan cheese, stirring constantly until all of the cheese has melted into the béchamel sauce. Add an additional cup of milk and cream. Taste and adjust the seasonings, if needed.

In another skillet cook the bacon until crispy and golden brown. Remove the cooked bacon from the skillet, reserve 3 tablespoons rendered bacon fat.

Add the cooked pasta to the béchamel and stir to coat evenly with the sauce. In a small bowl, combine the bread crumbs, chopped parsley, and reserved bacon fat. Coat the bread crumbs and chopped parsley with bacon fat and sprinkle the mixture over the top of the macaroni. Sprinkle the top with ½ cup Parmesan cheese.

Bake until the top is browned and the sauce is bubbling, 20 to 25 minutes. Top with crumbled cooked bacon.

Let sit 5 minutes before serving.

The Best Smoked Shrimp Andouille Jalapeño Popper Appetizers

These are the best, but they are not easy to make.  I recommend preparing them and smoking them the first day.  Then finish them off the day these appetizers are to be served.

Ingredients:

  • 16 Jalapeño
  • 16 ounces peeled and deveined shrimp (31-40 count)
  • 1 tablespoon Cajun Seasoning (Tony Chachere’s Original Creole Seasoning)
  • 1 package Philadelphia Cream Cheese
  • 1 teaspoon rosemary, finely chopped
  • ¼ cup fresh parsley, chopped
  • 1 shallot, minced
  • 1 cloves garlic, minced
  • ¼ small green pepper (2 tbsp) – minced
  • ¼ small red pepper (2 tbsp) – minced
  • ½ rib celery, minced
  • 1 teaspoon black pepper, cracked
  • 8 ounces Andouille Sausage, diced
  • 2 lbs of thin cut bacon (16 slices per package)
  • 2 tbsp rendered bacon fat or olive oil.

Preparation:

Begin by rinsing the shrimp and patting them dry.  In a bowl, toss the shrimp with your favorite Cajun seasoning. Cover the shrimp and let the seasoning work into them, in the refrigerator.

Prepare your smoker and set to no more than 250° F.  I used the Emeril Lagasse stove top smoker with apple wood smoke chips and adjusted the temperature with an infrared thermometer.

In the meantime, remove the cream cheese from the refrigerator and allow it to come-up to room temperature. While waiting for the cream cheese and the shrimp, mince all the vegetables except the jalapeño. Sweat the minced vegetables in a skillet with bacon fat or olive oil, until soft.  Remove from pan and add to a mixing bowl to cool.  

Wash and then split the jalapeño peppers in half. Scoop out the seeds and ribs with a spoon (try to keep the stem intact).

In the bowl with the softened vegetables, add and mix together with the diced Andouille sausage, rosemary, parsley, cream cheese and black pepper. Set aside to build the jalapeño poppers.

Stuff all the jalapeño pepper halves with the cream cheese mixture. Then come back around and place a shrimp over the top of the cream cheese and wrap them with a slice of bacon.  Dust them with more Cajun seasoning.

Place them in the freezer for 30 minutes or the refrigerator overnight.

After they harden, move them to the smoker and smoke them for 2-2 ½ hours at 250° F, per batch.

Before you can serve them, the poppers will need to cool.  Return them to the refrigerator or the freezer to harden again.  Just before serving, turn on your oven’s broiler to a medium low, place the rack in the upper part (not the top).  In a skillet, cook the bottoms of the jalapeño popper’s until they are crispy (approx 4 -5 minutes). Transfer the jalapeño poppers to a cooking tray and broil them for about 10 minutes, until golden brown.  Remove from the oven and allow them to cool and crisp before serving.

Ima Cheat, Making Cheesy Bacon Jalapeño Mini Corn Breads

I wanted to test out my new, “Square-shaped Mini Muffin Baking Tray.” Originally, I purchased it to make mini square cupcakes. Those I’ll make another day.

In lieu of the cupcakes, I decided to make mini corn breads; but with a twist. I’ve made corn bread from scratch before; but it was a pain. This is an easy recipe to make with good results.

Give it a try…

Ingredients:

  • 2 boxes Jiffy Corn bread Mix
  • 2 tbsp Sugar
  • ½ cup of Milk
  • ½ small Vidallia onion, finely diced
  • 2 eggs, lightly beaten
  • ½ tsp salt
  • ¼ tsp ground black pepper
  • 1 garlic clove grated
  • 2 cups shredded Monterey/Cheddar Cheese
  • 8 slices Center Cut Bacon, cooked and crumbled
  • 2 whole Large Jalapeno Peppers, seeded and finely diced
  • ¼ cup reserved bacon fat
  • 2 tbsp reserved bacon fat for greasing the tins.

Preparation:

Preheat your oven to 400⁰ F. Fry up the bacon, to a crisp, on low heat to render out the bacon fat.  Reserve the fat for use in the mix and to grease the tins. In the same skillet add the onion, jalapeño peppers and grate in the clove of garlic. Sweat the veggies for a few minutes over low-medium heat. Remove and add to the mixing bowl to cool.

Mix together the two boxes of Jiffy Corn Bread Mix. Add everything into a mixing bowl: the sugar, black pepper, salt, sweat veggies, eggs, milk, crumbled bacon, rendered bacon fat and cheese. Mix to combine, do not over mix the batter.  Let the batter rest for 15 minutes, before filling the mini muffin tins.

Lightly grease the muffin tins with some of the reserved bacon fat (PAM, if you so feel inclined). Fill the tins 3/4 from the top. Tap the baking tray on counter top and let it rest a few minutes before putting it in the oven.

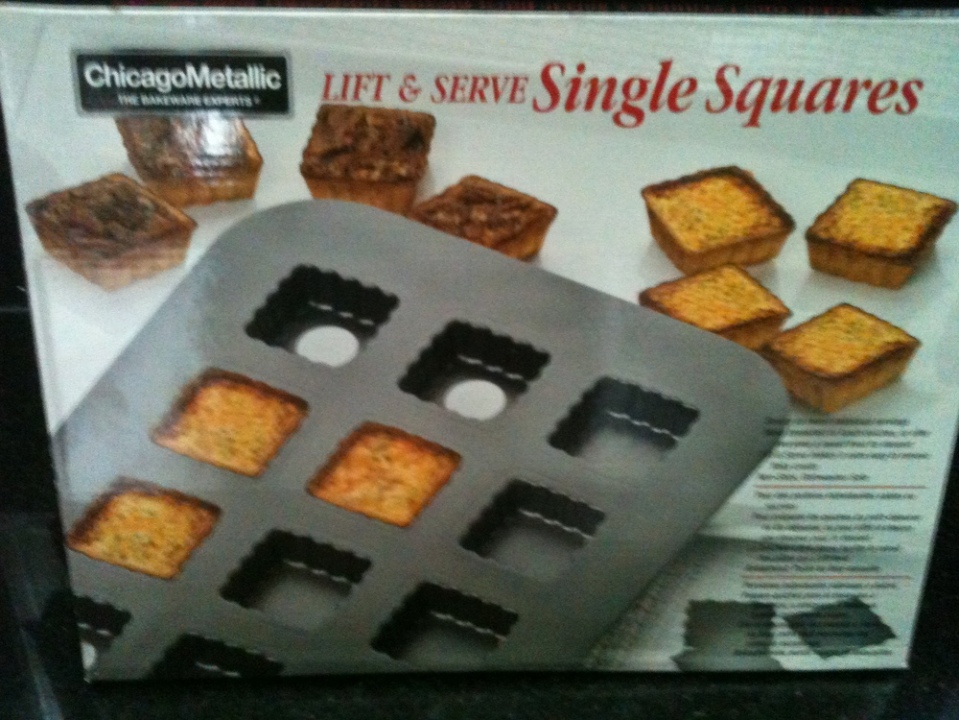
Above is the mini muffin baking pan I used.

Bake at 400⁰ F for about 17-20 minutes or until the edges start to turn golden brown. Use the tooth pick test to confirm they are done. Remove from the oven and let cool in the pan for 10 minutes.

Finished product. I packed them into a zip lock for storage.  Reheat at 400⁰ F for 5 minutes to serve, or microwave for 15 seconds.

Enjoy…

Bacon Air: Bacon Flavored Pure Oxygen

J&D’s Foods, the amazing folks that brought you the much-lauded Baconsalt, have unleashed their latest bacon creation: BaconAir. According to their site, BaconAir came about after discussing the next logical step for bacon after Baconsalt. After all day brainstorming, the team hit on a key question:

What if bacon was lighter than air?

It was that last question that got the dialogue really going and led to another seemingly ridiculous question – what if bacon was air? After all, oxygen is the most important nutrient to the cells in your body, and plays an integral role in almost every bodily function. And bacon is the most delicious of meats.

One thing lead to another, and BaconAir was born. The concoction is a “refreshing burst of bacon-flavored pure oxygen,” and uses the extra-healthy 95% pure Himalayan oxygen. It is also fat and calorie free and, Kosher, and available now for pre-order. Surely, this will be imitated at shifty oxygen bars across America, but accept nothing but the original BaconAir.

Now, there may those among you that do not share my passion for this delicious, aerosol product. Let me tell you a story: When I was but a lad, I suffered (as I still do) from nasty seasonal allergies. To combat these, I was once prescribed a nasal spray that I was told would cure all that ails me. After spraying it up my nose for the first time, I immediately noticed an overwhelming floral odor, that was about as much like flowers as platapi are like birds. This was disconcerting, but not really a problem until I wandered into the kitchen where bacon was being fried. Even standing next to the griddle, I smelled nothing but those awful, fake flowers.

Now, BaconAir seems to be more of taste, rather than smell, experience. But just imagine, if you will, that this amazing bacon-based technology had been widely available in my youth! That wretched medicine would have been tolerable, nay desirable, and my whole life would have gone down a far more beautiful path whose glories I am not even worthy to contemplate.

So, friends, buy some BaconAir and support this amazing breakthrough in meat consumption. Do it because you love bacon, but do it mostly for the children. Because they are our future, and the need more bacon-related products.

(J&D Foods via Buzzfeed)

Meat Healing with Bacon Band-Aids

Meat healing

In the olden days (at least, from what we learned from cartoons), when someone got a black eye, the best remedy was to put a steak on it. Imagine that: curing (get it?) a wound with meat! We’ve always thought bacon was the balm for any emotional wound, and now it can help physical ones as well! Introducing Bacon Strips Adhesive Bandages!

Bacon Strips Adhesive Bandages are wiggly-cut, adhesive bandages that look like strips of bacon (hence the name). And really, that’s about it. But by looking like bacon, they are suddenly (without hyperbole) 8 bajillion times more awesome than a regular adhesive bandage. You could even put some on, go to your local grocery store’s meat department, and pretend the bacon is attacking you like leeches. Hey, that sounds like fun. We’re going to do that now, while you buy some Bacon Strips Adhesive Bandages. Oh, and enjoy the free prize in every tin.

Bacon Strips Adhesive Bandages

  • They look like strips of bacon, but they are really just adhesive bandages.
  • Sterile, latex-free bandages.
  • 15 bandages per container.
  • Free prize in every tin!

Bandage Dimensions: 3″ x 1″